The first time I saw a game within Houdini was in an old Tutorial made by Varo Castaneda. It was a simple turn based game made through Python within Houdini.
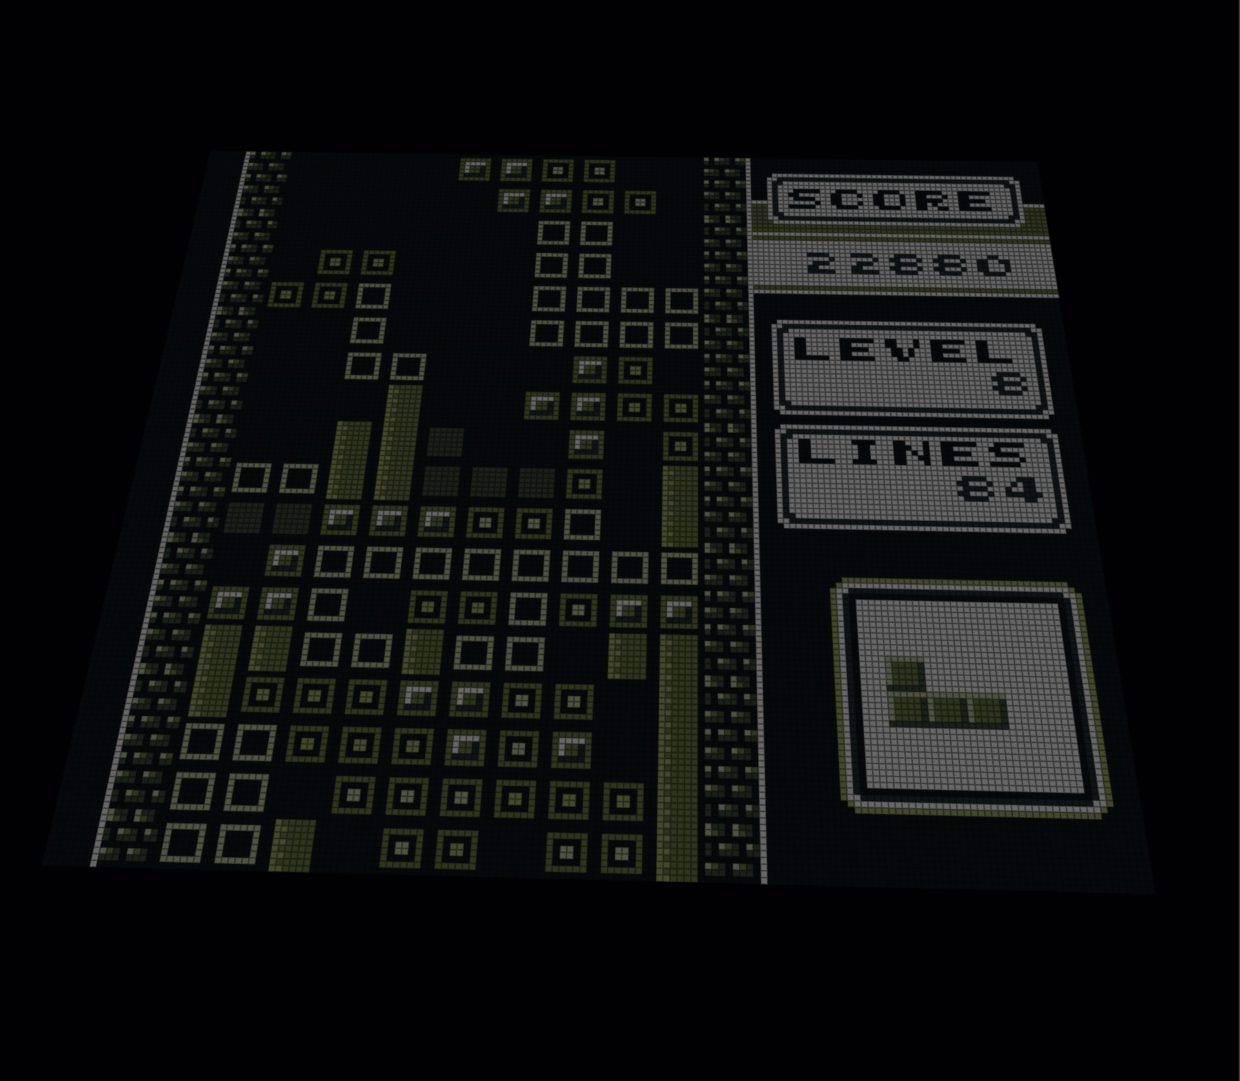
I was always wondering how far you could push the idea of creating a small Game within Houdini. My goal was to create Tetris within Houdini one Day. I didnt know that in fact this would turn out to be much easier than I first expected. After the prototype was done I wanted to recreate as close of a clone of the Tetris version on the GameBoy.
This got me down a little Rabbit Hole which made me write a small Header File for VEX to simulate a PixelEngine based on the original GameBoy. It is loosely based on the olcPixelEngine from Javid. Also thanks to Javid who helped me with the code in C++. I ported his code to VEX with some small finetuning

Making a Prototype in Houdini
The prototype was made based on Javid’s Tetris. You can find his tutorial her It is a very good Tutorial and I recommend following him as he has many other great Coding Videos which you can adapt to VEX. As C++ is very similar to VEX its fairly easy to transfer C++ into VEX. There are some limitations i’m still trying to find out what works best, Especially with structs as they seem a bit limited in VEX at the moment.
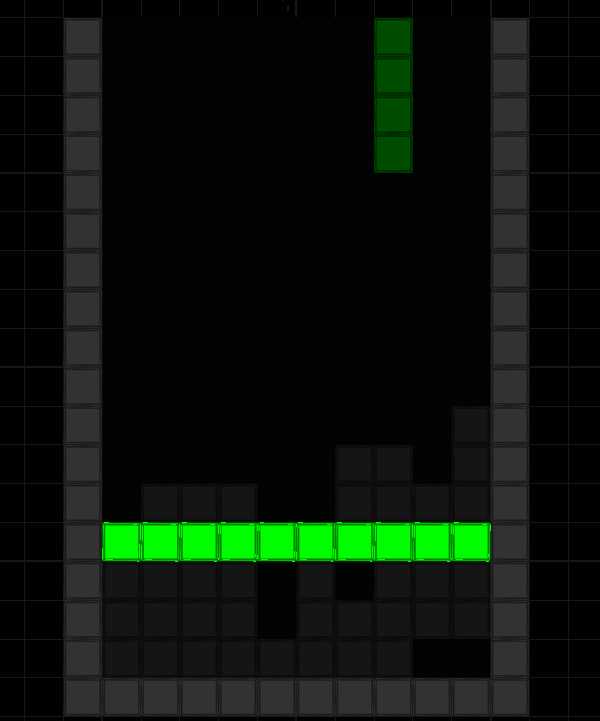
However for Tetris, we wont deal with structs. The main thing to know is how to work with 1D + 2D Arrays and how to index those.
Setup in Houdini
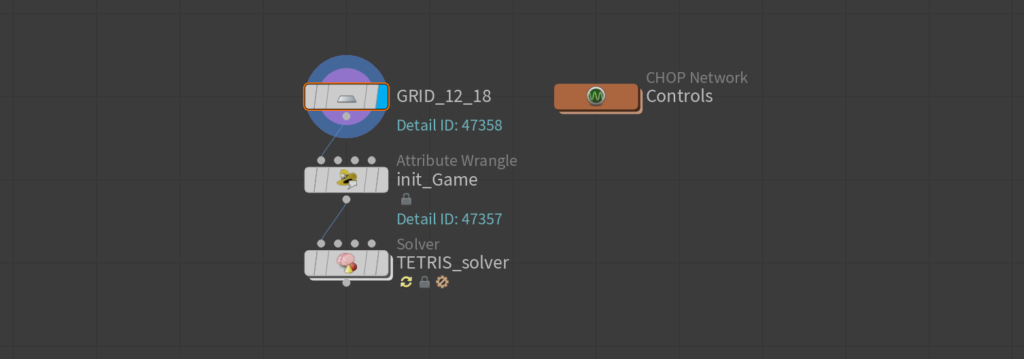
init_Game Code
In the init_Game Wrangle we setup some default variables and
string tetromino[];
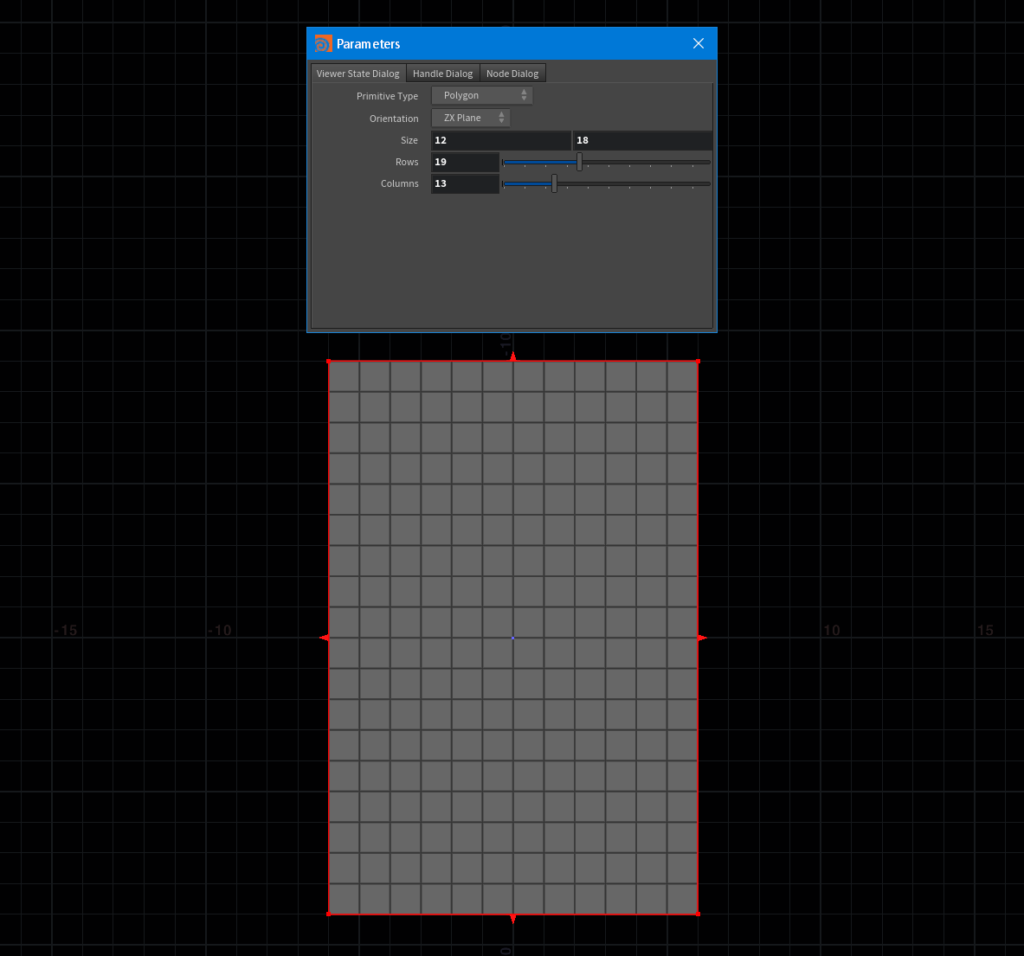
int nFieldWidth = 12;
int nFieldHeight = 18;
#define WIDTH 12
#define HEIGHT 18
i@nCurrentPiece = 3;
i@nCurrentRotation = 0;
i@nCurrentX = nFieldWidth / 2 ;
i@nCurrentY = 0;
i@nSpeed = 20;
i@nSpeedCount = 0;
i@bForceDown = 0;
i@bRotateHold = 1;
i@nPieceCount = 0;
i@nScore = 0;
i[]@vLines;
i@bGameOver = 0;
i@nState = -1;
tetromino[0] = ("..X...X...X...X.");
tetromino[1] = ("..X..XX...X.....");
tetromino[2] = (".....XX..XX.....");
tetromino[3] = ("..X..XX..X......");
tetromino[4] = (".X...XX...X.....");
tetromino[5] = (".X...X...XX.....");
tetromino[6] = ("..X...X..XX.....");
s[]@tetromino = tetromino;
int pField[] = array(); // Create play field buffer
resize(pField, nFieldWidth*nFieldHeight);
i[]@pField = pField;The Solver
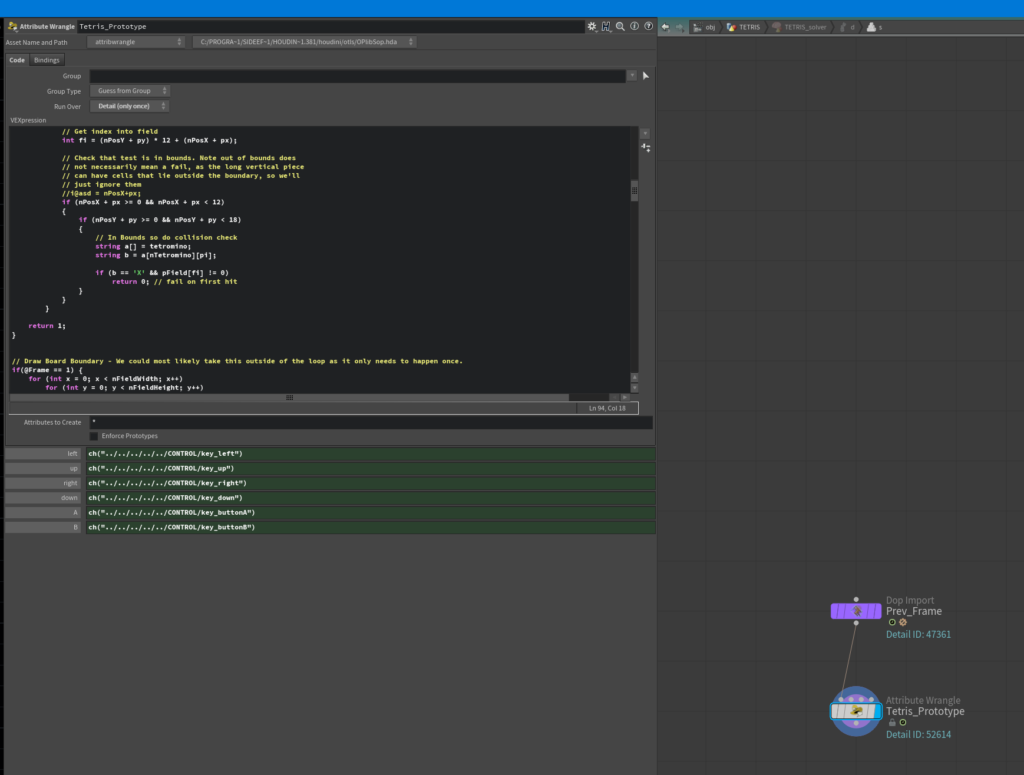
Within the Solver we simply connect a VEX Wrangle in Detail mode. This Wrangler holds the entire code to run Tetris. It also sets a boolean for left, up, right, down A + B buttons which are read from a Null CONTROL Operator which is reading its input through Chops. That way we can write some other Games in the future and easily access the Keyboard inputs without the need to set up anything.
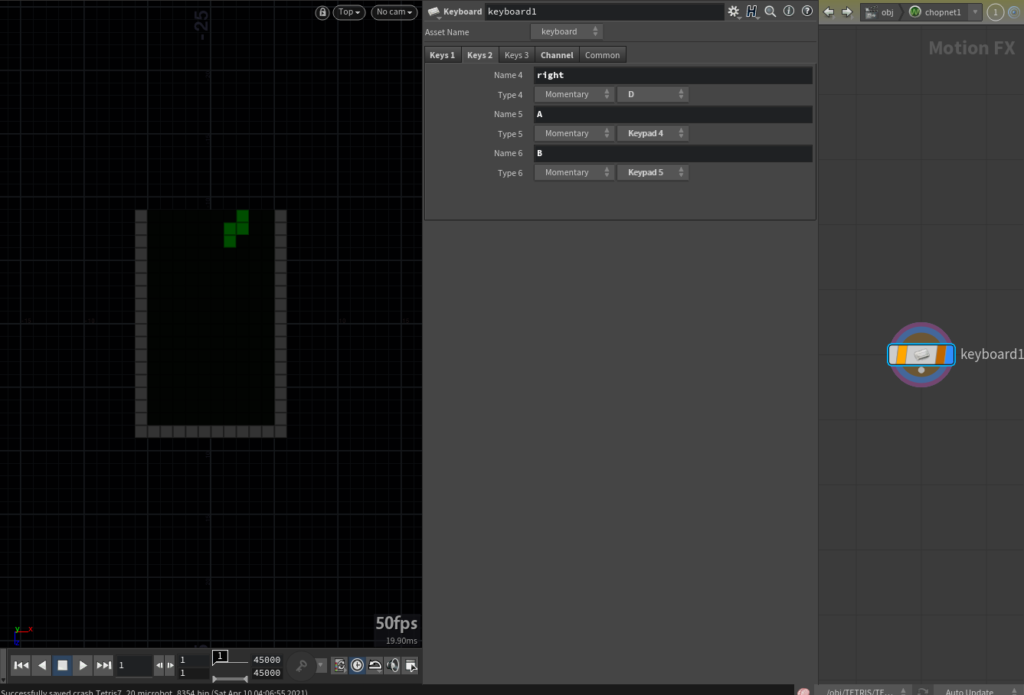
Reading Keyboard inputs from Chop
For getting Keyboard input we can use a Keyboard CHOP in Houdini.
Within the CHOP Network at the root level there is a single Node where we can map a string value to each Key as following:
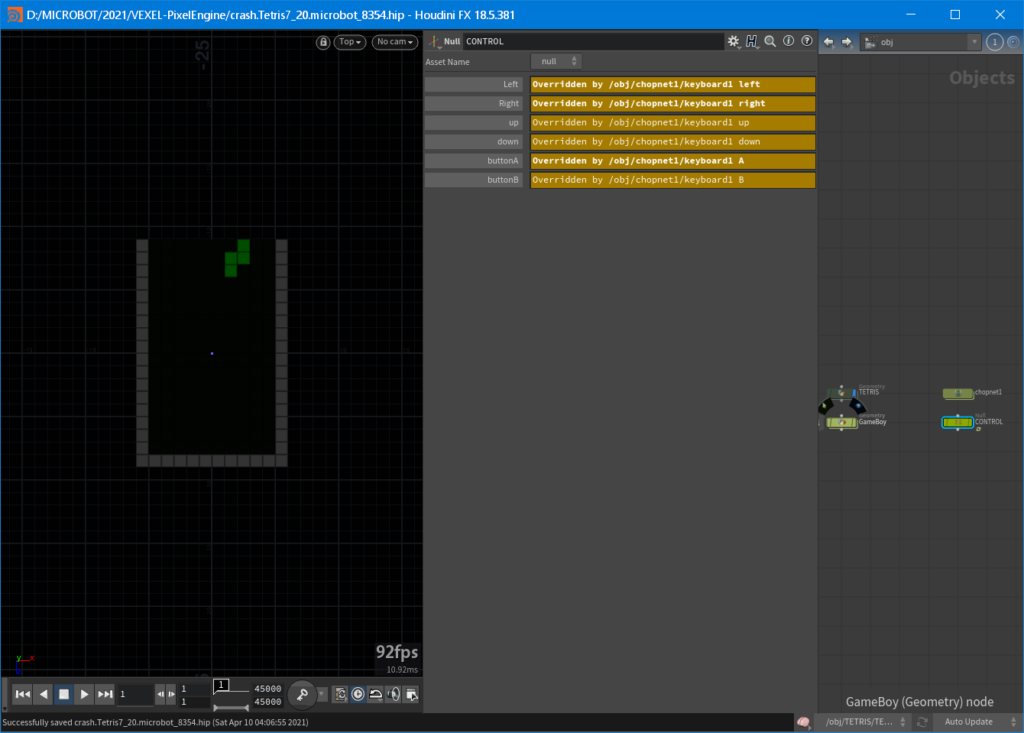
Override Parameters from CHOP’s
Setting up CHOP Overrides by right click and select Exporter – Set Scope

Make sure you set the export tag (orange)
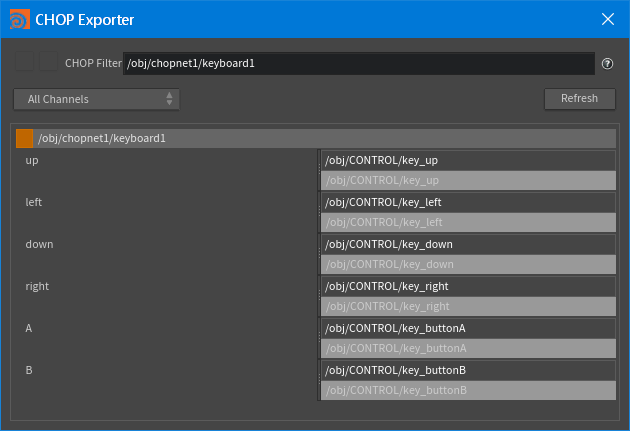
You can link the channel data in this window, for more details see the Houdini Documentation